Tiny Homes
Living in a tiny home offers freedom, simplicity, and often the dream of going off-grid. But one of the biggest questions for those starting their tiny living journey is:
“What size solar system do I need for my tiny house?”
In this guide, we’ll break it down step-by-step so you can confidently design a solar setup that fits your lifestyle—without overspending or undersizing.
✅ Step 1: Understand Your Energy Needs
Before you buy anything, you need to know how much electricity you use daily.
Start by listing everything you plan to run in your tiny home. Then calculate how many watt-hours (Wh) each device uses in a typical day.
🧾 Example Daily Usage:
Appliance Power (W) Hours/Day Daily Use (Wh) LED Lights (x6)105300 Mini Fridge100241200 Laptop604240 Phone Charging10330 Water Pump2500.5125 Fan406240 Total2135 Wh (~2.1 kWh)
Tip: Always add a 20–30% buffer to account for inefficiencies, cloudy days, and future expansion.
Adjusted Total: ~2.7 kWh/day
✅ Step 2: Determine Solar Panel Requirements
To figure out how many solar panels you need, divide your daily energy usage by the average number of peak sun hours in your area.
Formula:
Solar Panel Watts Needed = Daily Wh ÷ Peak Sun Hours
Example: In Georgia or the Southeast U.S., you’ll typically get 5 peak sun hours/day.
2,700Wh ÷ 5 = 540W of solar needed
Add 25% buffer → ~700W total solar panel capacity recommended
This could mean:
- 2x 350W solar panels
- 3x 250W solar panels
✅ Step 3: Choose a Battery Bank
Batteries store your solar energy for use at night or during cloudy days.
Battery Sizing Formula:
Battery Storage (Wh) = Daily Usage x Days of Autonomy
Example: For 2 days of backup:
2.7 kWh/day x 2 = 5.4 kWh
5,400Wh ÷ 24V = 225Ah
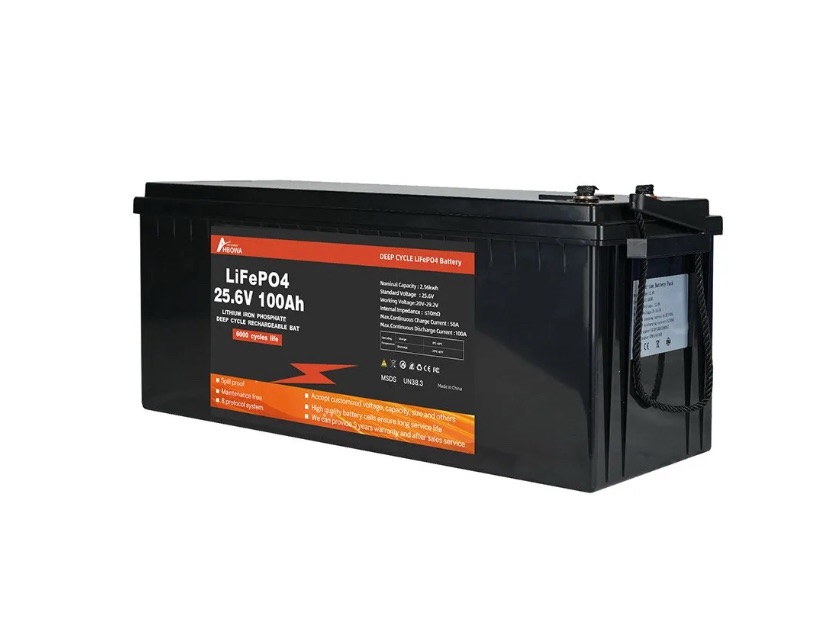
- 2x 24V 100Ah LiFePO₄ batteries
- 1x 48V 100Ah server rack battery (preferred for efficiency)
✅ Step 4: Inverter Sizing
Your inverter converts DC battery power to AC power for your appliances.
Find your peak load—the total wattage you might use at once—and add a safety margin.
Example:
Fridge (100W) + Fan (40W) + Laptop (60W) + Pump (250W) = 450W
Add buffer → 800W–1000W inverter is sufficient
For heavier loads (microwave, induction, etc.), consider a 2000–3000W pure sine wave inverter.
✅ Step 5: Pick the Right Charge Controller
To safely charge your batteries, you’ll need a solar charge controller.
MPPT Charge Controller Formula:
Solar Panel Watts ÷ Battery Voltage = Minimum Amps
Example: 700W ÷ 24V = 29A → Choose a 40A MPPT charge controller
⚡ Sample Setup for a Tiny Home
ComponentSpecs Solar Panels3x 250W = 750W total Batteries2x 24V 100Ah LiFePO₄ Inverter1000W–2000W Pure Sine Wave Charge Controller40A MPPT
🧠 Final Thoughts
The ideal solar system size for your tiny home depends entirely on how you live. If you use a lot of electronics or electric heating, you’ll need more capacity. If you go minimal, your system can stay small and affordable.
Start by calculating your daily usage. Then build your system piece by piece. Oversizing slightly now can save you from expensive upgrades later.
📬 Ready to Build Your System?
Check out these related DIY solar setup guides:
- How to Connect Solar Panels to Batteries and an Inverter
- 12V vs 24V vs 48V Systems: What’s Best for Tiny Homes?
- Best Budget Solar Batteries in 2025 (DIY Tested)
Got a question about your setup? Drop it in the comments—we’re here to help!


